How to Photograph Vivid Sydney

Every year since 2009, Sydney holds the Vivid Sydney Festival of Light, Music and Ideas. Here, designers showcase their talented and intricate minds by putting together some amazing installations and animations. World famous landmarks such as the Sydney Opera House and the Harbour Bridge are illuminated in vibrant colours and animations whilst other landmarks play host to some quirky yet entertaining installations. The event is held during winter in central Sydney over the course of 18-days in May and June. The centrepiece of Vivid Sydney is the light sculptures, multimedia interactive work and building projections that transform various buildings and landmarks such as the Sydney Opera House and Sydney Harbour Bridge in and around the Sydney CBD into an outdoor night time canvas of art. Vivid Sydney was voted Australia's Best Event in 2013 and Best Tourism Event in 2014. It attracts lots of Sydneysiders and tourists and provides plenty of opportunities for photographers. I hope this guide with simple recommendations, tips and tricks will help you shooting the next Vivid Sydney event.
Virtually it is possible to divide Vivid Sydney photographic subjects into two main categories - The Sydney Opera House and everything else. These two subject will be covered separately with technical aspects will be covered after that.
The Sydney Opera House
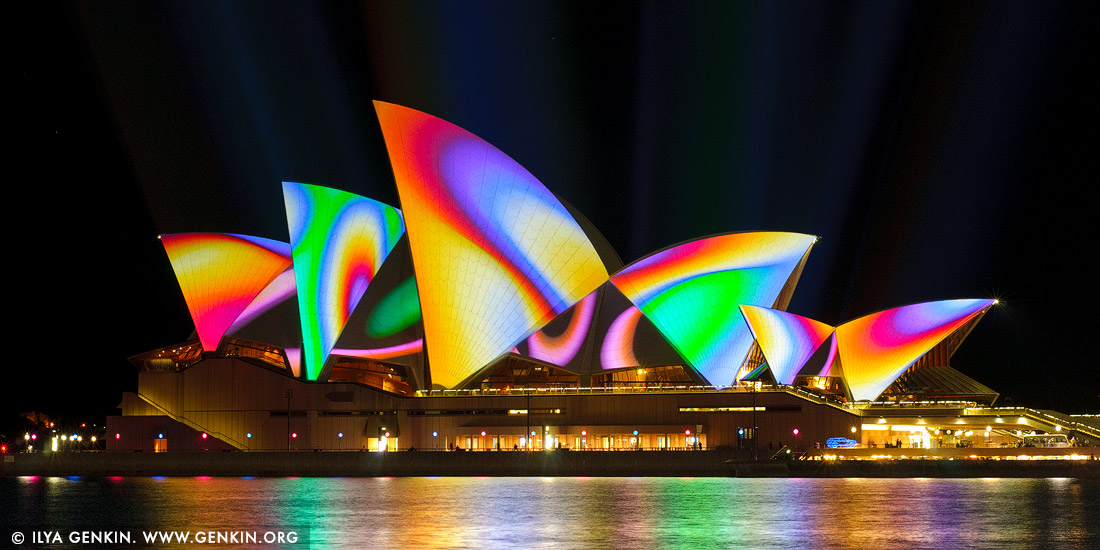
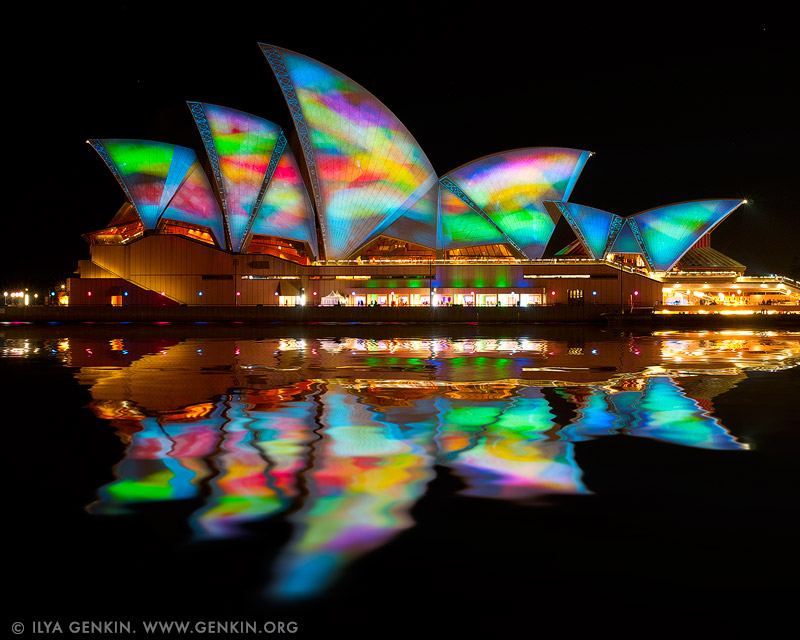
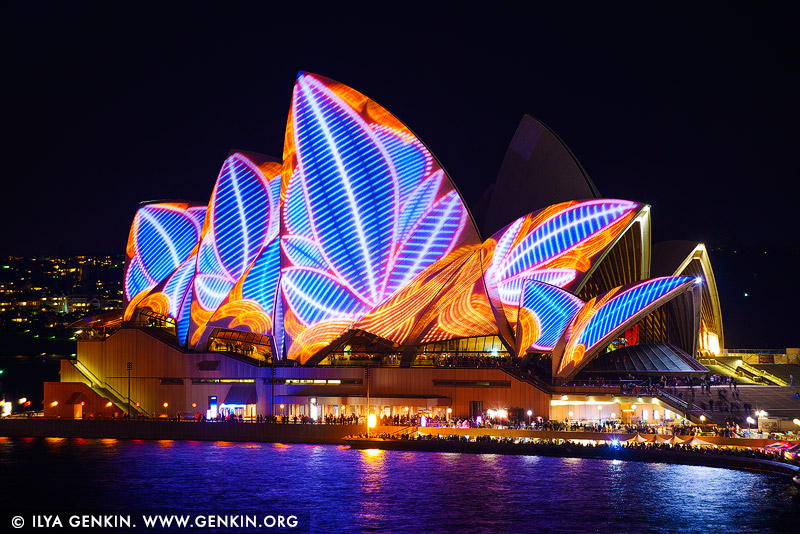
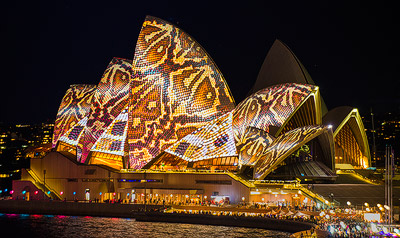
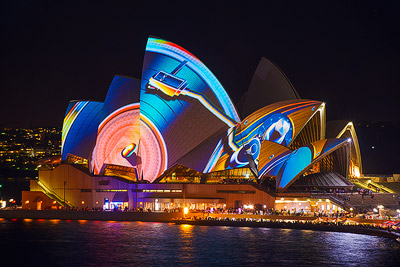
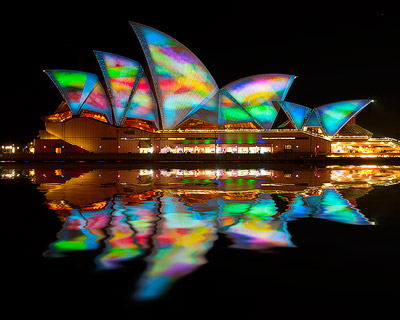
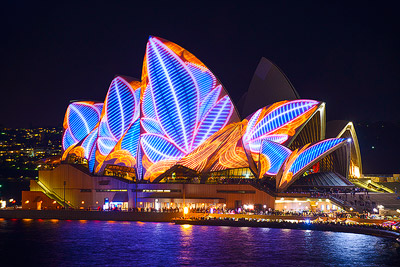
It is quite easy to photograph The Sydney Opera House at the Vivid festival. There are few well known locations providing great view. While there are many places were you can shoot the Opera House there are five best places to do that.
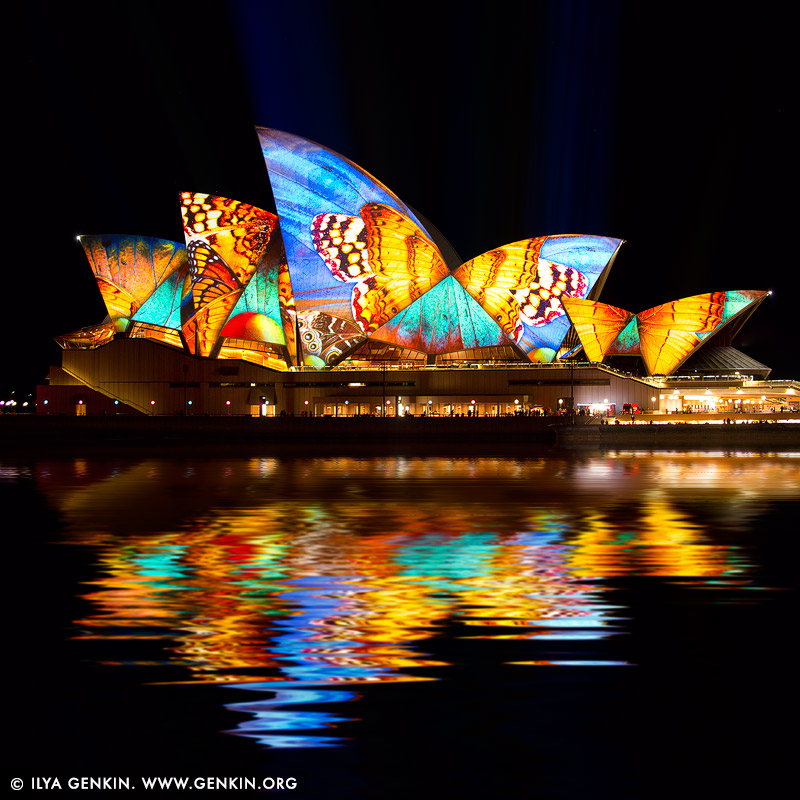


1. Overseas Passenger Terminal
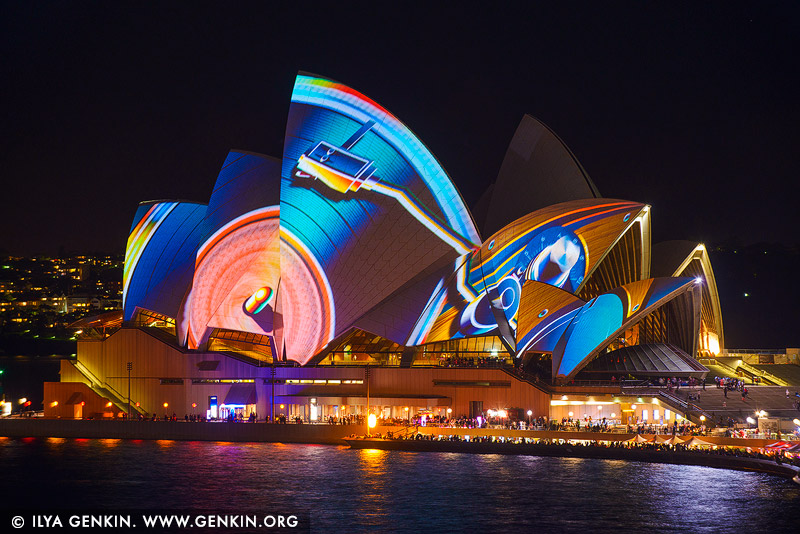
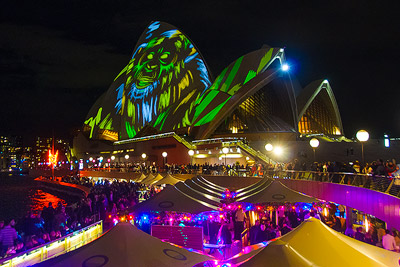
The ground level at the Overseas Passenger Terminal is probably the best location to shoot the Opera House as it provides the most front on view. Huge light projectors illuminating the Opera House are installed either on the top deck or on the top of the tower there. If you are standing right below the projectors you will be able to capture light rays in the dark sky. You can use lenses from wide angle to short telephoto depending on your preferences.
2. The Cahill Expressway
The walking path that runs along the Cahill Expressway is the second best location for close-up shooting the Opera House. You can access the walkway by getting the lift from the ground level next to the Circular Quay station or stairs up from both ends of the Circular Quay. This place provides an elevated view to the Opera House and the Circular Quay. For this place you need normal to telephoto lenses to create close-up shots of the Opera House and wide angle lenses if you want to include surroundings.

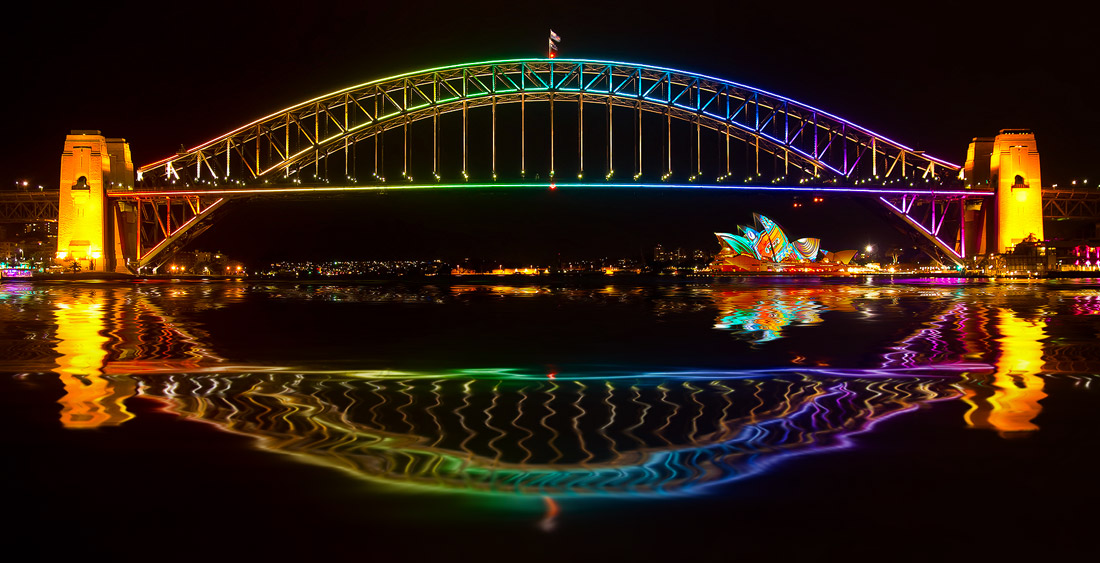
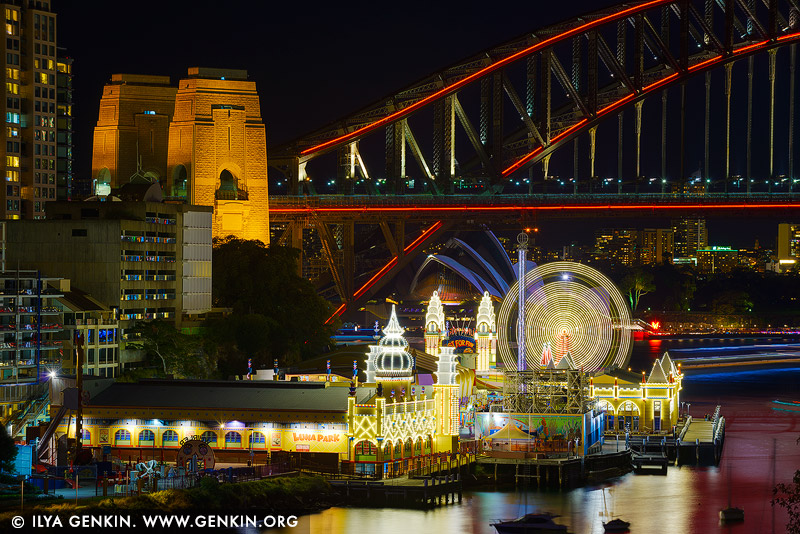
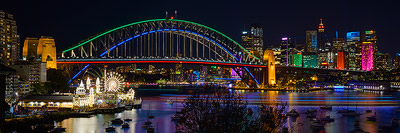
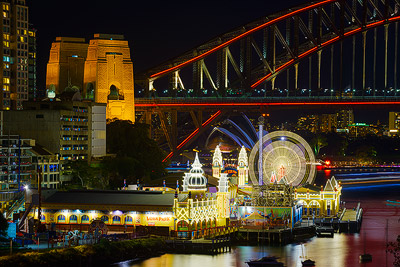
3. Luna Park
This spot is located at the end of Alfred Street in Milsons Point and all the way up to the entrance to the Luna Park. It provides a great view to the Harbour Bridge as the main point of interests and the Sydney Opera House and the city highlighted in different colours. This place requires wide angle lens.
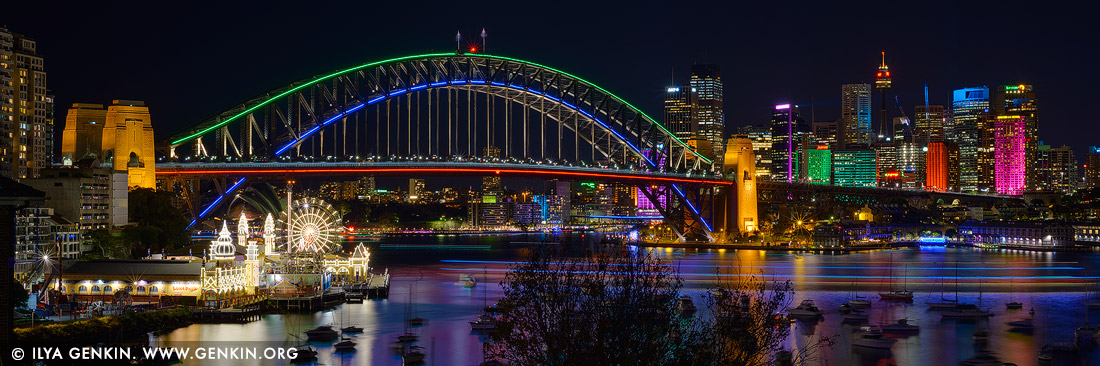
4. Blues Point
This is the most front view of the Harbour Bridge with the Opera House is under the Bridge on the right. It is perfect for the wide angle panoramic shot of the whole Bridge or for a zoom lens to capture just a part of the Bridge with Opera House in full focus.

5. Lavender Street
This spot is located on the Lavender Street in Lavender Bay close to the Blues Point Road. This is less known location but can provide quite nice view of the Harbour Bridge, Luna Park, the city and the harbour. For this place you need normal to telephoto lenses to create close-up shots.
Other Places at Vivid Sydney
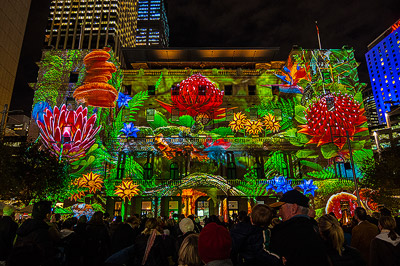
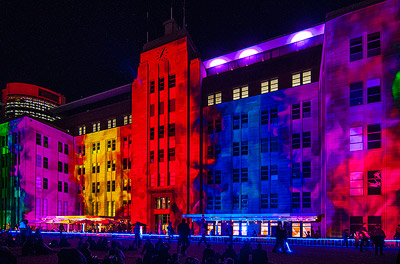
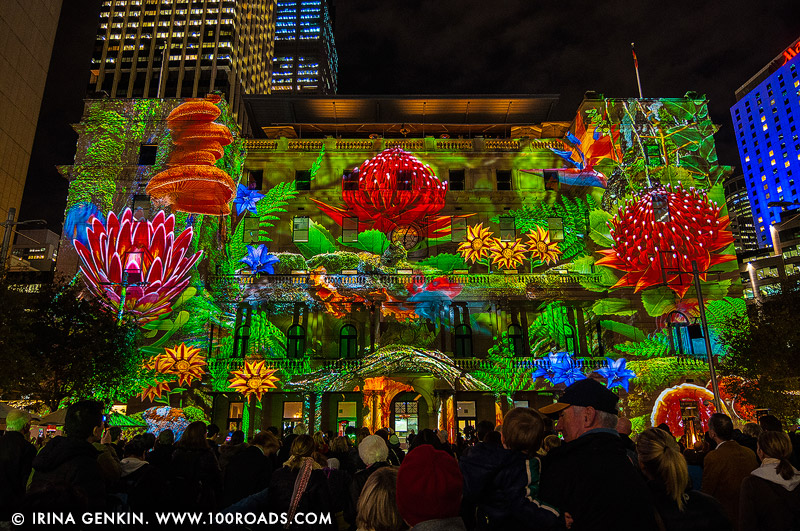
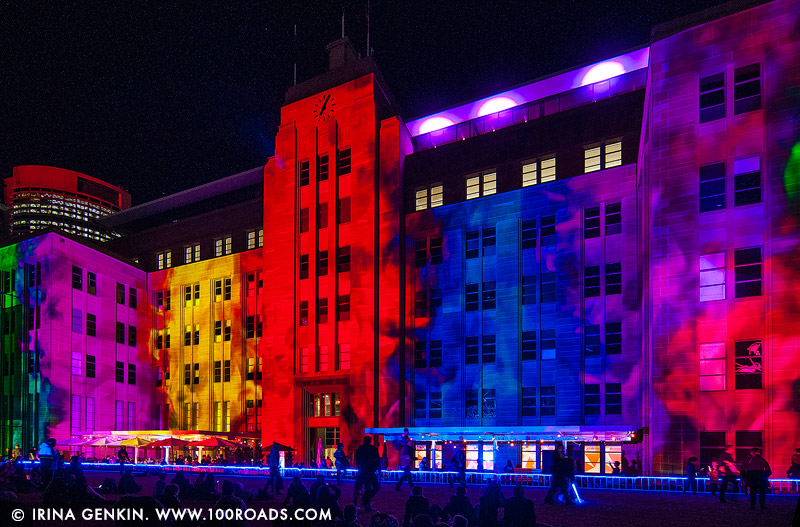
The Museum of Contemporary Art and The Customs House
The Museum of Contemporary Art and The Customs House have similarities in shooting. Both buildings have videos projected onto them and you have to shoot from the close distance so you will need a wide angle lens and you will have lots of people in front of you enjoying the show. Usually it's fast changing video so you either have to record a video or shoot at a very short speed (around 1/30th sec) to freeze the moment. Otherwise the image might be blurred.
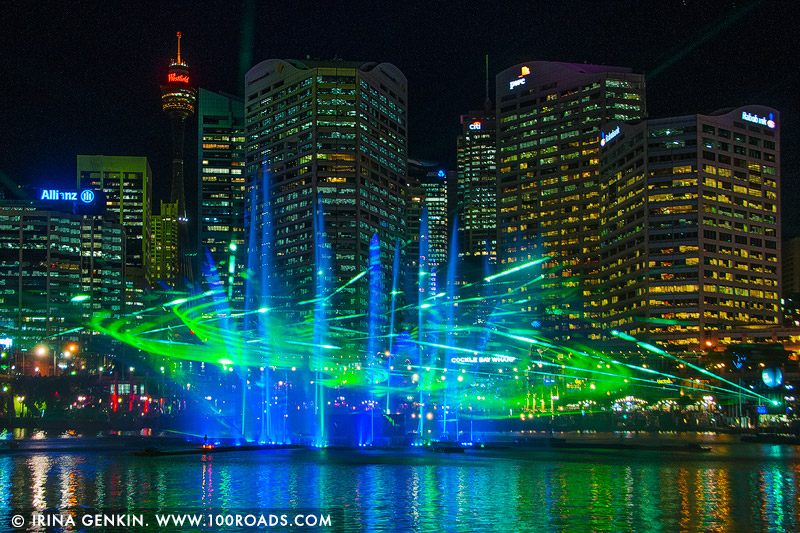
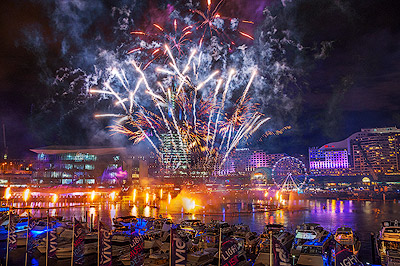
The Darling Harbour
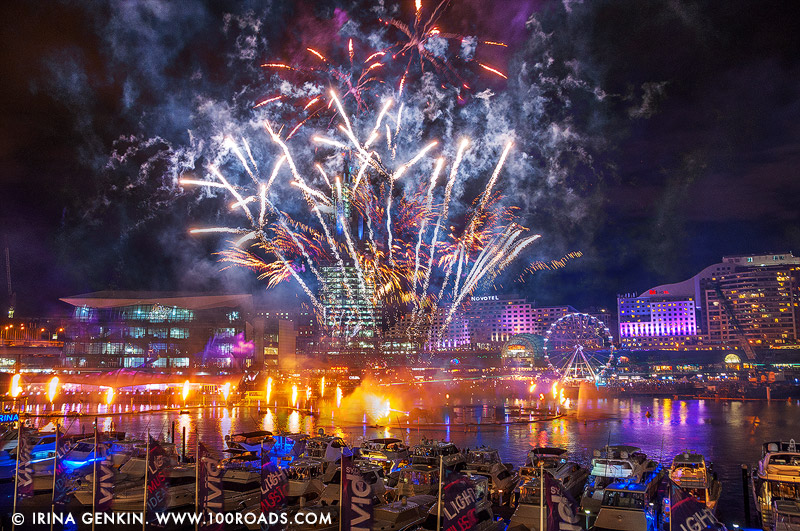
The Darling Harbour has laser water fountain display installed. It's like the Bellagio Casino water show at Las Vegas, but in the middle of Darling Harbour and a bit smaller. Flames, lasers and water jets shoot 100 metres across the harbour and 30 metres into the air creating a spectacular show. Also there are fireworks running once per evening. It's very fast changing scene with relatively dim lights as laser is projected onto water sprays and therefore you need high ISO and short shutter speed. You can shoot either from the western side of the Darling Harbour or from the Pyrmont Bridge for elevated view.

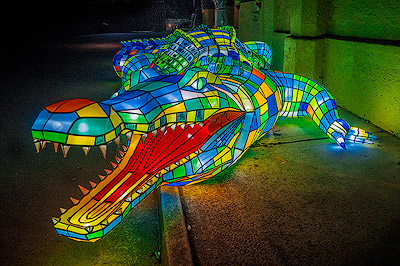
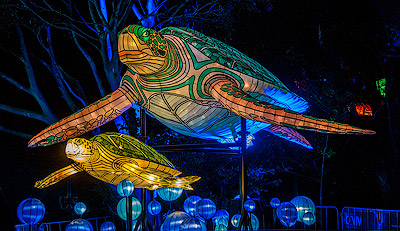
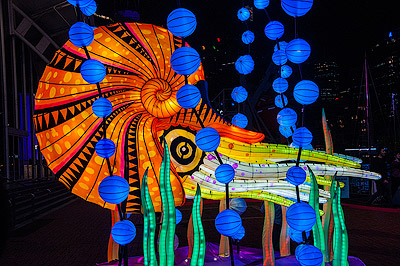
Taronga Zoo
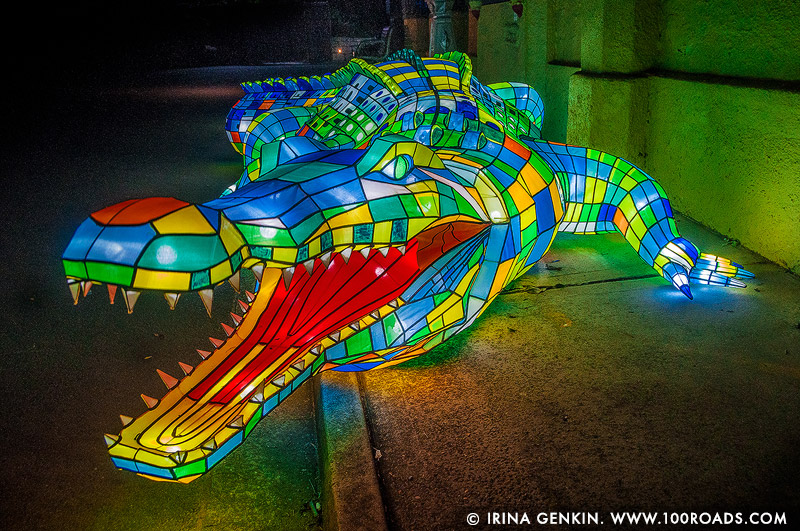
Taronga Zoo in Mosman has incredible giant animal light sculptures installed. Some of them are are slightly moving, some of them are glowing. In addition to the sculptures the main entrance has light show similar to the The Museum of Contemporary Art and The Customs House. Most of the time you will need lenses from wide angle to normal ones. Allow one full night just for Taronga. It's almost impossible to do something else on that night. Pay attention to the movement and adjust the exposure setting to get sharp images. Entrance to the Taronga Zoo is paid. You can purchase tickets online in advance at Vivid Sydney at Taronga Zoo.
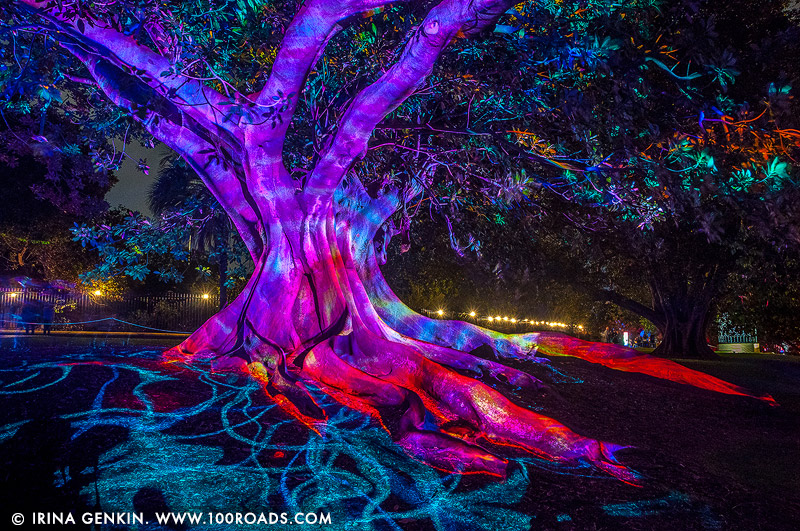
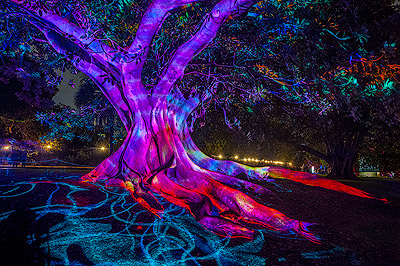
The Royal Botanic Garden
The Royal Botanic Garden has a number of different installations, but the most prominent is the Electric Forest - music, lighting design and animation projected onto one of the Garden's magnificent fig trees. It's easy to photograph as it has a few good pre-defined spots for placing a tripod. You will need a wide angle lens there.
Chatswood
Every year the buildings, shopping malls, streets and laneways of the Chatswood CBD changed so it's quite difficult to predict what will be there. Most of the time you will need lenses from wide angle to normal ones. Do a stroll there before started shooting, find good places with a nice view and then start shooting.
The other places worth photographing are Martin Place, University of Sydney, Sydney Town Hall, Walsh Bay and lots of light installations in the Rocks and around.
Technical Tips and Tricks
1. Use a Tripod
Tripod is the very first thing you need for making sharp images. It doesn't matter if your camera can produce great shots at high ISO you still need a tripod as sometimes exposure could be up to a few seconds even at high ISO. Also shooting sessions at Vivid Sydney run for tens of minutes and camera with lens can become very heavy for steady hand-held shooting. With a tripod you will always produce have pin-sharp images. Just please remember, you need be mindful of the people around you while carrying your tripod in the crowd, and it's best to fold it up when walking between shooting and scouting for a spots to shoot from.
2. Use a Remote Control
The second important thing after the tripod for making sharp images is using remote shutter release or remote control. depending on your camera it could be wired or wireless (infrared or radio). Remote control is required to prevent camera shake when you are pressing the shutter button. Even if you have a solid tripod your camera will move under your fingers and by using remote control you can get mush sharper images. If you do not have a remote control you could use the self timer function of your camera, but you will have slight delay (at least 2 seconds) from pressing the shutter to taking the picture. It's all right for steady scenes but with moving ones you can miss your shot.
3. Increase ISO When Needed
ISO is also known as film speed and it is a measure of the sensitivity of your sensor in your camera. The higher the value, the more sensitive the camera will be to light, and the brighter your picture will be. The lower the setting, the darker it will be. Also the higher the value, the more grainy (AKA 'noisy') images will look like. This is the price we have to pay for using a fast shutter speed at night.
Some scenes at Vivid Sydney are moving quite fast and if your shutter speed is not short enough you will get blurred lights. Buildings and surrounding will be sharp but all light will be blurred even if you are using a tripod. You need to play with the ISO during shots and adjust it to the required shutter speed in order to freeze lights movement or capture a certain colour. Start with ISO 400 and increase as you need to 800, 1600 or even higher. If the scene becomes very bright you can always decrease ISO. For steady shots you can lower ISO down to ISO 200 or 100.

4. Use Manual Mode
It is quite important to use Manual Mode on your camera instead of Shutter or Aperture Priority. You need to be able to change the shutter speed, aperture size and ISO value to get proper exposure for the scene you are shooting. If you want to freeze motion you have to use faster shutter speed so you will need to open aperture and increase ISO. If you want to get blurred lights then you will need to do the opposite.
5. Use Fast Shutter Speed
Lots of scenes at Vivid Sydney are fast moving images. having long exposure of a few seconds can blur the lights and create either overexposed image or just unpleasant messy image. Try to freeze the action with relatively short shutter speed such as 1/30th or 1/15th of a second. Later you can always adjust the shutter speed to shorten it even more or make it longer and capture more light and movement. Combine it with changing ISO to capture the exposure and scene you need.
6. Use Wide Aperture
Normally with landscape or cityscape photography photographers are using small aperture like f/8 or f/11. With shooting at night you need more light and therefore you need to open aperture. If you are using zoom lens then try to use f/4 or so and if you are using a prime lens then you can try f/2.8 or even wider. However some lenses are not performing too well wide open so check how sharp your images are at the widest aperture and close it down for 1 or 2 stops.
7. Use a Universal Zoom
If you are planning a long photographic session and want to shoot from multiple locations you will need a few lenses to cover wide angle shots when shooting close to the building like the Customs House or the Museum of Contemporary Art, normal lenses when shooting relatively close and telephoto lenses if you are shooting from the distance. Carrying lots of heavy equipment as well as changing lenses in a busy crowd could be problematic sometimes. In this case a universal zoom will help you so you don't need to swap lenses. Almost all brands nowadays have quality zooms like 18-135 or 28-300.
8. Shoot RAW
With shooting RAW instead of JPEG you will have ability to enhance your image later on a computer with retaining image quality. You will be able to adjust white balance, exposure and contrast, colours, reduce noise etc. So if your camera has the option to take photos in RAW format then this is what can I suggest.
9. Shoot Late and Mid-Week
Vivid Sydney attracts large crowds and some locations become highly congested, especially on weekends. About 1.7 million people attended the event in 2015, so there will be lots of people everywhere. However Vivid starts at 6pm and finishes at 11pm, so if you can arrive a bit later on in the evening you are likely to run into less of a crowd as many people go back home after long day. That is especially true for families with kids and prams. Also usually weekend nights attract more crowd than during the week when people prefer to stay at home and prepare for the next day. So take advantage of this fact, avoid Friday - Sunday evenings and go late on a weeknight after 9pm to avoid large crowds.
10. Timing is The Key
Almost all image projections are rapidly changing so timing is the key for good photograph. You need to know when to press the shutter button and for how long. Lots of people are shooting non-stop without analysing the result and at the end they are getting quite average results. All image projections are running in a loop so watch the entire sequence at first and analyse the speed of changing scenes. You need to watch the whole scene at first so you can plan and anticipate next time when to trigger the shutter. For static or slow-changing scenes you can lower ISO and use longer shutter speed for getting sharper image with less noise and richer colours. For rapidly changing scenes you will need to increase ISO and shorten shutter speed to minimise blurring and prevent losing colours.
11. Have Fun
Have fun just enjoying the show.
Tips for experiencing Vivid Sydney
- Come early and stay late. Some of the lights start at 5:30pm when the sun goes down or run only limited times at some specific time.
- Don't just focus your time on the Opera House, Circular Quay and The Rocks. There are many more precincts with cool light displays happening over the city. Every year more precincts are added. Check out all the precincts on the official website.
- Spend more than one day so you can experience the different areas slowly.
- Visit mid-week when crowds won't be as intense!
- Don't drive. Make use of all the public transport options, there will be extra trains and buses running during the Vivid festival.
- Walk - it's the best way to experience all of what Vivid offers.
- Bring warm clothes and wear layers.
Fine Art Prints Australia
Shop online, drop an email or call us. Ilya Genkin Photography is your one-stop online store for all your wall art needs. Internationally recognised photography artist, Ilya Genkin creates beautiful photographic images to transform any home or office into an amazing and inspiring space. Ilya's works are available to fine art collectors as stretched and non-stretched canvases as well as the highest-quality fine-art photographic paper prints. Whether you're looking to add a touch of nature to your living room, create a relaxing ambiance in your bedroom, or spruce up your office space, our extensive collection of wall art has something for everyone. With our user-friendly website, it's easy to browse our selection, find the perfect piece, and have it delivered straight to your doorstep. Ask now about a mockup to show how your chosen Ilya Genkin photograph will transform your space into something amazing and stunning. So why wait? Start exploring our collection today and transform your space with our stunning wall art.
Artworks for Interior Designers, Home Stylists, and Architects
Ilya Genkin’s Print Collection is a range of affordable art pieces which can also be purposely modified and reproduced to match the interior stylings and colours of your project. All artworks are 'made to order' only. Pricing will depend on the sizes of artwork ordered, the number of pieces in each order and freight costs involved. Please feel free to contact us to discuss your requirements and we can arrange a quote for you.
By supporting Ilya Genkin Photography, you're not only indulging in the joy of owning exceptional art, but you're also empowering an independent artist and a small local business. Each purchase directly contributes to the growth and success of an Australian talent, nurturing a vibrant and diverse art community in our country.
Fine Art Landscape Photography
Information
Photography Guides
Online Store Opens 24/7
Email:
Phone: +61 (0) 421 055 613
Ilya Genkin Photography acknowledges the Traditional Custodians of the land on which we operate, live and gather as employees, and recognise their continuing connection to land, water and community. We pay respect to Elders past, present and emerging.