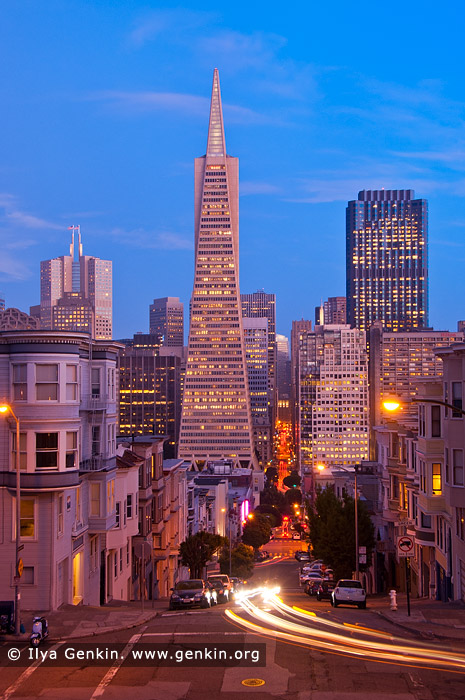
Where and How to Photograph San Francisco: A Guide to Iconic Locations
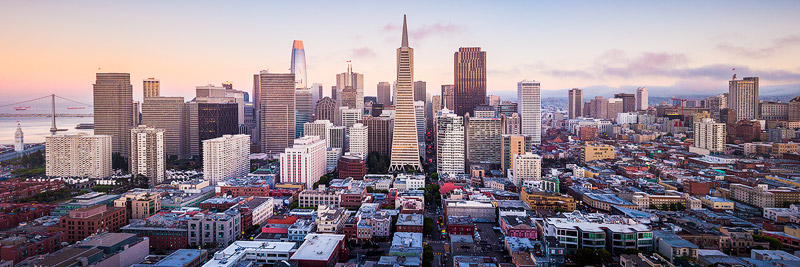
San Francisco, with its iconic landmarks, rolling hills, and breathtaking views, is a paradise for photographers. From the golden hues of the Golden Gate Bridge at sunrise to the sparkling city lights at dusk, the city offers endless opportunities to capture its charm and character. Whether you're seeking sweeping panoramas, architectural details, or hidden gems, San Francisco’s diverse landscapes cater to every style of photography. This guide explores the best locations to photograph the city, including tips on the ideal times to shoot, the best angles to consider, and the lenses to bring along. Get ready to discover the most photogenic spots in the City by the Bay and elevate your portfolio with stunning images of this vibrant urban landscape.
As usually all these places and lookouts are easily accessible by foot, public transport or by taxi/car. I also provided links to Google Maps and The Photographer's Ephemeris (TPE).
Location 1: Painted Ladies at Alamo Square
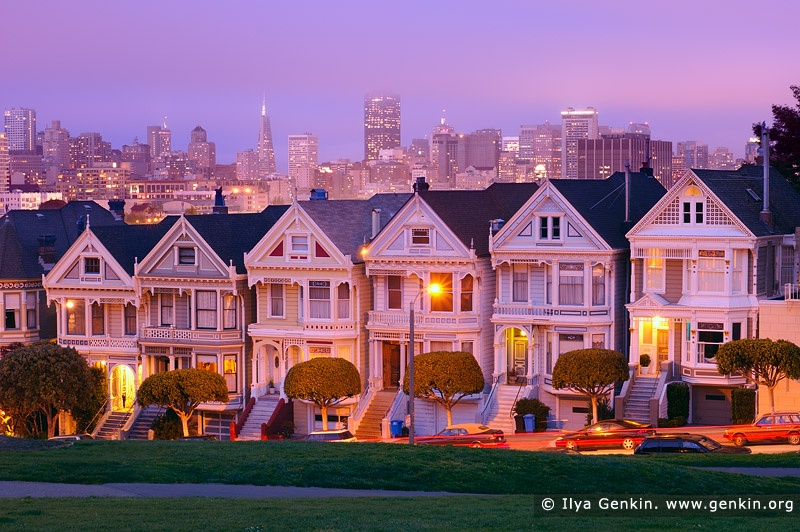
The Painted Ladies, a row of colourful Victorian houses at Alamo Square, also known as The 'Seven Sisters of Postcard Row', are a quintessential San Francisco landmark. These historic homes are set against the modern downtown skyline, creating a striking juxtaposition of old and new. Alamo Square Park provides an excellent vantage point, with opportunities to include greenery or pathways in the foreground.
Best Time to Photograph:
- Late Afternoon: The warm, golden light enhances the colours of the houses and the surrounding park.
- Sunset: The city skyline glows in the background, creating a dynamic composition.
Getting There & Parking: Parking could be a problem there. You might need to park a bit further on neighbour streets and then walk.
Recommended Lenses:
- Wide-Angle Lens (16-35mm): To capture the entire row of houses with the skyline.
- Normal Lens (50mm): For a balanced perspective focused on the Painted Ladies.
- Telephoto Lens (70-200mm): To focus on architectural details or compress the houses and city.
- Scenic Value:

- Photographic Interest:

- Road Difficulty:

- Trail Difficulty:

Painted Ladies on maps:
Location 2: San Francisco Skyline from Twin Peaks
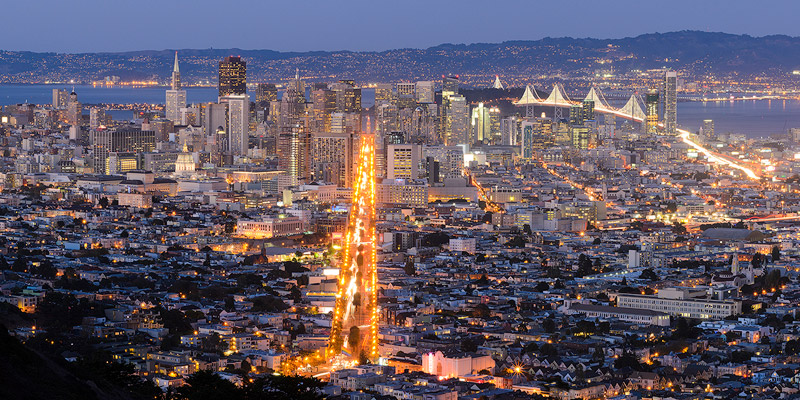
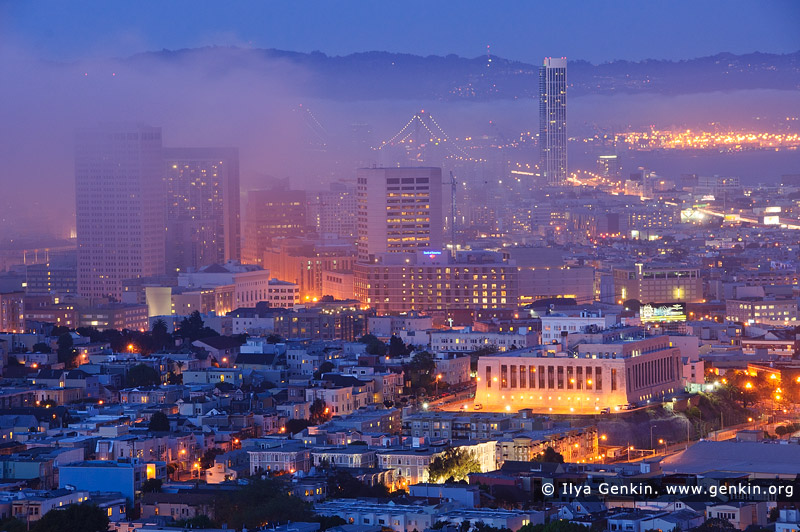
San Francisco Skyline from Twin Peaks at Night, California, USA
Twin Peaks is one of the highest natural points in San Francisco, offering panoramic views of the entire city. From here, you can capture the downtown skyline, the Bay Bridge, and even the distant East Bay hills on a clear day. The view changes dramatically with the light, making it a versatile location for different moods.
Twin Peaks is one of the most iconic spots to photograph San Francisco, offering panoramic views that stretch across the city, from the downtown skyline to the Bay Bridge and beyond. Situated at an elevation of over 900 feet (270 meters), it provides a dynamic vantage point for capturing the city's layout, often framed by the winding roads leading to the summit. Sunrise is ideal for photographing from Twin Peaks, as the soft morning light bathes the city in warm tones, often accompanied by ethereal fog. Sunset and blue hour are equally captivating, with the skyline lighting up and the Bay shimmering in the fading light. A wide-angle lens is perfect for sweeping cityscapes, while a telephoto lens can zoom in on specific details like the Transamerica Pyramid or the Bay Bridge. Arrive early to secure parking and position your tripod, and bring layers—it can get chilly and windy at the top!
Best Time to Photograph:
- Sunrise: The city is bathed in soft, golden light, and early fog often creates an ethereal atmosphere. The air usually cleans up at night, affording you a clearer view during the early morning hours, shortly after sunrise.
- Sunset or Blue Hour: The skyline lights up, and the fading natural light adds depth and drama. The city has a completely different view at sunset as the light will have changed dramatically.
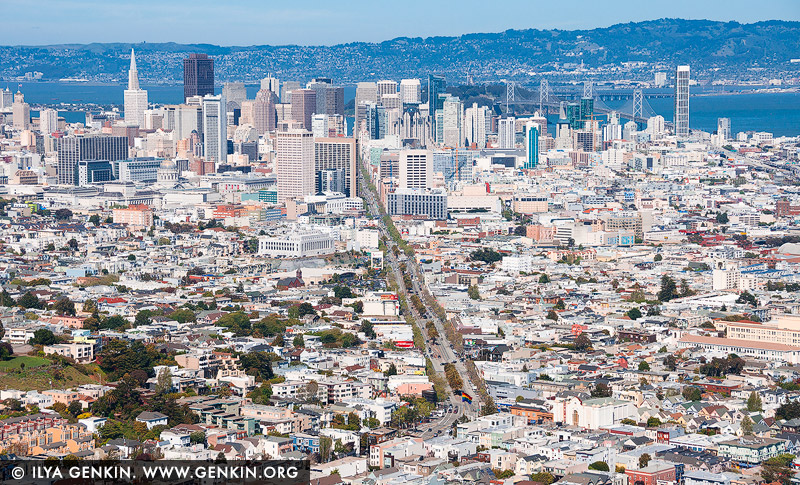
San Francisco Skyline from Twin Peaks, California, USA
Getting There & Parking: Apart from joining a tour group, the only way to get there is taking your own car. The way up to Twin Peaks is easier to find from Portola Drive in the south (red) while you can take another way down (blue) to 17th Street and Market Street. From south of San Francisco, take Highway 280 into the city and follow Highway 1 / 19th Street north. From here, the Portola Drive exit is easy to find and you can simply follow it to Twin Peaks. From downtown San Francisco, find Market Street and follow it southwest away from the financial district.
Recommended Lenses:
- Wide-Angle Lens (16-35mm): To include the cityscape and surrounding hills.
- Telephoto Lens (70-200mm): For close-ups of the downtown skyline and bridges.
- Scenic Value:

- Photographic Interest:

- Road Difficulty:

- Trail Difficulty:

Twin Peaks on maps:
Location 3: Oakland Bay Bridge from Treasure Island
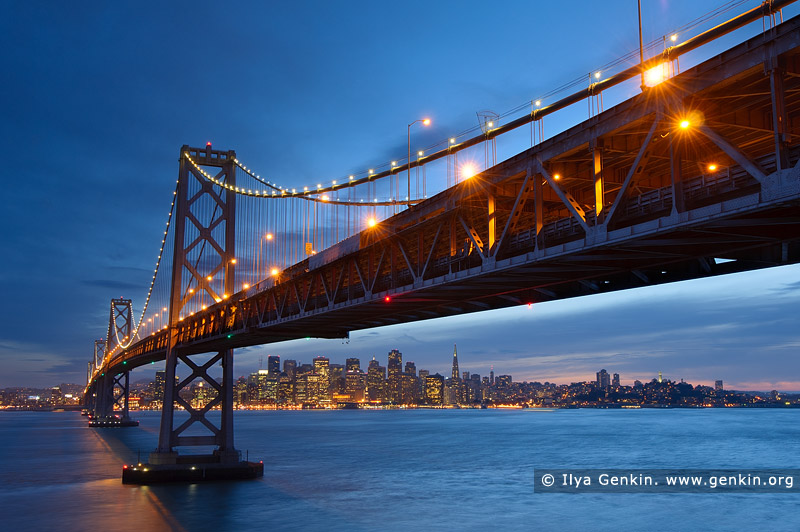
Treasure Island, located in the middle of San Francisco Bay, offers unbeatable views of the Oakland Bay Bridge and the San Francisco skyline. The lights of the bridge reflecting on the water create magical compositions, especially at night.
Photographing the Oakland Bay Bridge from Treasure Island Road on Yerba Buena Island offers a striking, straight-on composition of the bridge's span, highlighting its impressive symmetry and scale. This viewpoint captures the bridge as it connects to the San Francisco skyline, making it especially stunning during blue hour or at night when the bridge and city lights illuminate the scene. There are a few photography spots on the Treasure Island and the Yerba Buena Island, however, this location comes with challenges: portions of Treasure Island Road are narrow and lack proper pedestrian pathways, raising safety concerns. Additionally, stopping along the road may violate traffic regulations or trespass on restricted areas. To avoid danger or legal issues, it's best to photograph from designated pullouts or accessible spots on Yerba Buena Island where photography is permitted and safe. Always check for posted signs and adhere to local rules to ensure a worry-free experience.
Best Time to Photograph:
- Golden Hour: Warm light enhances the details of the bridge and cityscape.
- Blue Hour: The bridge's lights glow, and the skyline begins to illuminate, creating a stunning contrast.
Getting There & Parking: From San Francisco, take I-80 East towards Oakland. You will cross the Bay Bridge on the lower deck. Stay in the left lane until you get to the Treasure Island Exit, which turns very sharply to the left. Drive straight until you get to the gate. Just before the gate, you can turn left through the center divider into the parking lot and viewing area.
Recommended Lenses:
- Wide-Angle Lens (16-35mm): To capture the entire bridge with the skyline.
- Telephoto Lens (70-200mm): To focus on architectural details or compress the bridge and city.
- Scenic Value:

- Photographic Interest:

- Road Difficulty:

- Trail Difficulty:

Treasure Island on maps:
Location 4: San Francisco Skyline from Corona Heights Park
Corona Heights Park provides an elevated, slightly hidden gem of a view of San Francisco's skyline. This rocky park, located near the Castro district, features a rugged terrain that adds natural elements to your compositions, such as boulders and native vegetation. The park's summit provides unobstructed views of downtown San Francisco, with the Transamerica Pyramid and other iconic skyscrapers forming the centrepiece of your shot. Sunrise is the best time to photograph here, as the soft, golden light enhances the textures of the rocks and casts a warm glow over the city. Sunset is equally stunning, with vibrant hues reflecting off the skyline and creating dramatic shadows. A wide-angle lens is ideal for incorporating the foreground and cityscape, while a normal lens is great for tighter compositions focused on the skyline. Bring sturdy footwear for the short but steep hike to the top, and enjoy one of San Francisco's most scenic and peaceful spots for photography.
Best Time to Photograph:
- Sunrise: The soft light highlights the skyline and the park's rugged textures.
- Sunset: Warm hues reflect off the skyscrapers, adding a dynamic glow.
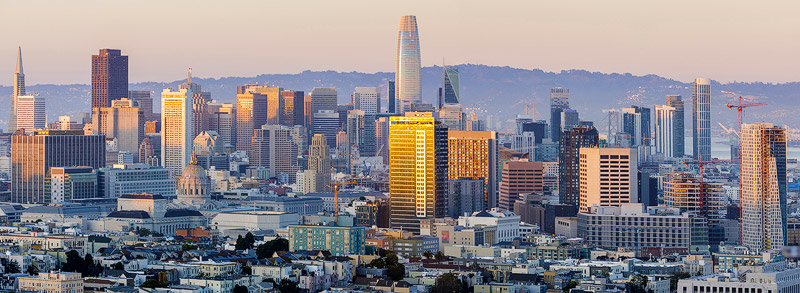
San Francisco Skyline from Corona Heights Park
Getting There & Parking: You can park your car either on Roosevelt Way, or Museum Way or at the Randall Museum parking lot and then hike uphill.
Recommended Lenses:
- Wide-Angle Lens (16-35mm): To include the park's natural features and the skyline.
- Normal Lens (50mm): For a focused and clean cityscape.
- Telephoto Lens (70-200mm): For close-ups of the downtown skyline and bridges.
- Scenic Value:

- Photographic Interest:

- Road Difficulty:

- Trail Difficulty:

Corona Heights Park on maps:
Location 5: Pier 7 and Transamerica Pyramid
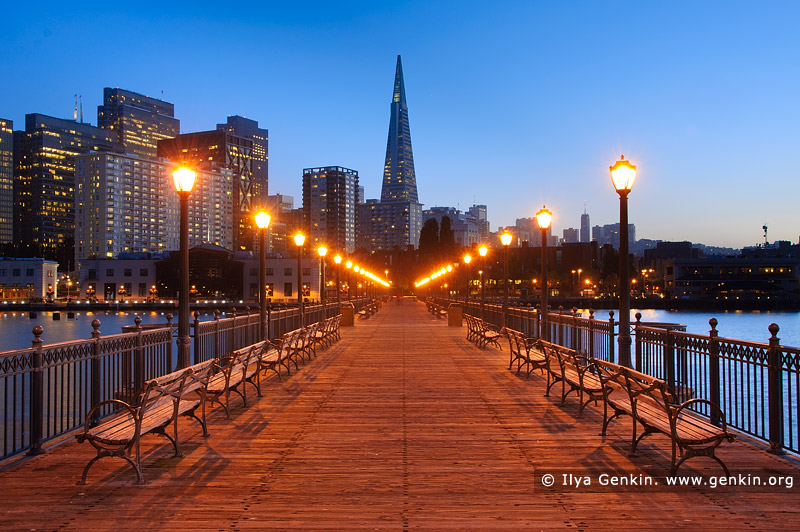
Pier 7 is one of the best places to photograph the Transamerica Pyramid with a dramatic leading line created by the pier's symmetrical lamp posts and railings. The waterfront adds reflections and depth, making it a favourite spot for photographers. Pier 7 provides some of the best views of San Francisco's skyline. From the pier you can see Coit Tower, the Transamerica Pyramid, skyscrapers in the financial district, and the Oakland Bay Bridge. The pier was originally built in 1901, but it was damaged in the 1989 Loma Prieta Earthquake and subsequently was demolished and rebuilt. The pier is 840 feet long and extends into water 35 feet deep.
Best Time to Photograph:
- Golden Hour or Blue Hour: The soft light adds dimension, and the illuminated skyline enhances the composition.
Recommended Lenses:
- Wide-Angle Lens (16-35mm): To capture the pier and the skyline in a single frame.
- Telephoto Lens (70-200mm): To zoom in on the Transamerica Pyramid and surrounding buildings.
- Scenic Value:

- Photographic Interest:

- Road Difficulty:

- Trail Difficulty:

Pier 7 on maps:
Location 6: Transamerica Pyramid from Montgomery Street
Standing on Montgomery Street and corner Green Street, you can capture the Transamerica Pyramid framed by the towering architecture of the Financial District. This urban canyon shot creates a sense of depth and scale, with the pyramid as the focal point.
Best Time to Photograph:
- Golden Hour: The light filters through the streets, creating long shadows and a warm glow.
- Blue Hour: The city lights add a dramatic urban ambiance.
Recommended Lenses:
- Wide-Angle Lens (16-35mm): For a dynamic perspective that includes the surrounding buildings.
- Telephoto Lens (70-200mm): To isolate the pyramid and its sharp geometric design.
- Scenic Value:

- Photographic Interest:

- Road Difficulty:

- Trail Difficulty:

Transamerica Pyramid from Montgomery Street on maps:
Location 6: San Francisco Skyline from Ina Coolbrith Park
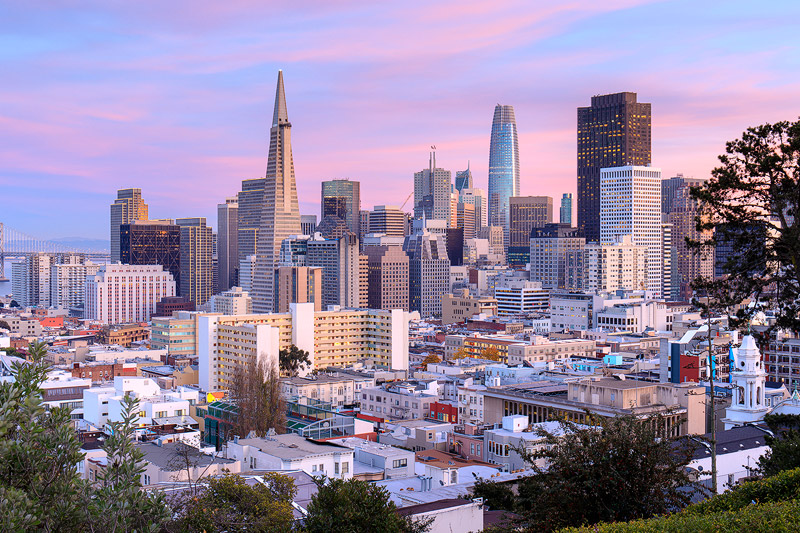
San Francisco Skyline from Ina Coolbrith Park
Ina Coolbrith Park is a hidden gem for photographing the San Francisco skyline, offering a beautifully framed view of the downtown area, including the Transamerica Pyramid, Coit Tower, and glimpses of the Bay Bridge. Nestled in the Russian Hill neighbourhood, this small, terraced park features lush greenery and steep steps, making it a peaceful retreat with a stellar vantage point.
Best Time to Photograph:
- Sunrise: The soft light illuminates the cityscape and often highlights the pastel hues of the buildings.
- Sunset and Blue Hour: The city lights creating a stunning contrast against the evening sky.
Getting There & Parking: Arrive early, as the park is compact and space can be limited. Don't forget sturdy shoes for the steep incline leading to this scenic overlook!
Recommended Lenses:
- Wide-Angle Lens (16-35mm): For capturing the skyline with the park's trees as a natural frame.
- Normal lens (50mm): Create balanced compositions focused on key landmarks.
- Scenic Value:

- Photographic Interest:

- Road Difficulty:

- Trail Difficulty:

Ina Coolbrith Park on maps:
Pro Tips for Photographing San Francisco
- Best Time: It doesn't matter where the sun rises or sets, it doesn't matter if the the weather isn't good, you still will be rewarded with great pictures in about half-hour before sunrise or half-hour after sunset. Half-hour after sunset even much better. The combination of illuminated buildings and darken sky creates dramatic and colorful images even on the worst days. But don't forget your tripod as low light requires long exposure. And usually buildings are more illuminated on weekdays rather on weekends.
- Check the Weather: Fog is common and can add mood to your shots, but plan accordingly for visibility.
- Use a Tripod: Especially for sunrise, sunset, or blue hour shots when light levels are low.
- Arrive Early: Popular spots can get crowded, so arriving early ensures you get the best vantage points.
- Bring Layers: Like any coastal region in Northern California, the weather may be unpredictable, so dress warmly, especially for sunrise shoots. On a calm day, the entire Golden Gate can be wonderful. If there's any wind at all, the Marin side may be windier than the San Francisco side. If the fog comes in the afternoon, expect the temperatures to drop quickly.
- Experiment with Foreground Elements: Incorporate paths, trees, or reflections to add depth to your photos.
Please also make sure you check the first article as well: Best Locations to Photographing the Golden Gate Bridge in San Francisco.
If you enjoyed this guide, don't miss the full collection of fine art photography in my San Francisco and The Golden Gate Bridge Photo Gallery, where every image is available for purchase as a high-quality print and licensing.
Ratings
|
Rating |
Scenic Value |
 |
Of no particular interest |
 |
Mildly interesting, visit if nearby and/or time permitting |
 |
Scenic location, worthy of a visit |
 |
Very interesting, scenic or original location |
 |
Remarkably scenic or rewarding location, a highlight |
 |
Word-class location, absolutely tops |
|
Rating |
Photographic Interest |
 |
Of no particular photographic interest |
 |
Worth of quick photo |
 |
Good photo opportunity |
 |
Good photographic potential and scenic subjects |
 |
Outstanding photographic potential, highly original or scenic subject |
 |
Worls-class photographic location, "photographer's dream" |
|
Rating |
Road Difficulty |
 |
Paved road, accessible to all normal-size vehicles |
 |
Dirt road accessible without difficulty by a passenger car (under normal conditions) |
 |
Minor obstacles, accessible by passenger car with caution (under good conditions) |
 |
High-clearance required, but no major difficulty |
 |
High-clearance 4WD required, some obstacles, no real danger |
 |
High-clearance 4WD required, some risk to vehicle & passenges, experienced drivers only |
|
Rating |
Trail Difficulty |
 |
No or very little walking (close to parking area) |
 |
Easy short walk (<= 1h r/t), for everybody |
 |
Moderate hike (1 to 3hr r/t) with no major difficulty or short hike with some minor difficulties |
 |
Moderate to strenuous (3 to 6hr r/t) and/or difficulties (evevation gain, difficult terrain, some risks) |
 |
Strenuous (>6h r/t) and/or globally difficult (evevation gain, difficult off-terrain, obstacles, risks) |
 |
Backpacking required or for extremely fit dayhikers |
About the Artist
I'm Ilya Genkin - an internationally recognised Australian landscape and fine art photographer offering wall art prints. My passion for capturing the beauty of nature and our world translates into striking photographic prints that bring life, emotion, and inspiration to any space. From tranquil seascapes to dramatic mountainscapes, each image is a reflection of my vision and dedication to the art of photography.
Read more about Ilya Genkin and shop fine art prints online from his collection.
Wall Art Prints Featuring Fine Art Landscape Photography
Explore my extensive collection of wall art prints - crafted with the highest-quality materials to suit every style and budget. Whether you're looking for a luxurious, ready-to-hang piece or a beautifully printed work to frame yourself, each photograph is available in several premium formats: Gallery-quality Fine Art Paper Prints - ready for framing, and Professional Canvas Prints - classic and timeless texture.
Each artwork is meticulously printed and made-to-order to ensure you receive a piece that elevates your home, office, or commercial space. Buy fine art prints online to suit your style.
Artworks for Interior Designers, Home Stylists, and Architects
I collaborate with interior designers, home stylists, and architects to create bespoke wall art prints tailored to your project's aesthetic, colour palette and interior design needs. Prints can be customised and sized to complement your space perfectly. All pieces are made-to-order, and pricing varies based on size, quantity, and shipping.
Contact me to discuss your project and request a personalised quote.
Why Choose Ilya Genkin Photography?
By choosing my work, you're not just acquiring exceptional art - you're supporting an independent Australian artist and contributing to a vibrant local creative community. Every purchase directly helps sustain and grow this craft, bringing authentic and meaningful art into your life.
Request a free mockup to see how a chosen photograph will look in your space before you buy.
Start your journey today - shop our wall art collection, purchase with confidence, or order custom prints today and transform your walls with fine art photography.
Fine Art Landscape Photography
Information
- FAQ - Landscape Photography Prints
- Purchase Fine Art Prints
- Black and White Fine Art Prints
- Art Consultation for Your Home
- Design Tips for Styling Your Space with Art
- Limited Edition vs Open Edition Prints
- Collector Resources
- FAQ - Image Licensing
- License Stock Photos
- Stock Photo Price Request
- Materials and Sustainability
Photography Guides
Online Store Opens 24/7
Email:
Phone: +61 (0) 421 055 613
Crafted with care for the planet - using sustainable materials and eco-friendly packaging.
Ilya Genkin Photography acknowledges the Traditional Custodians of the land on which we operate, live and gather as employees, and recognise their continuing connection to land, water and community. We pay respect to Elders past, present and emerging.
